Rich text editor
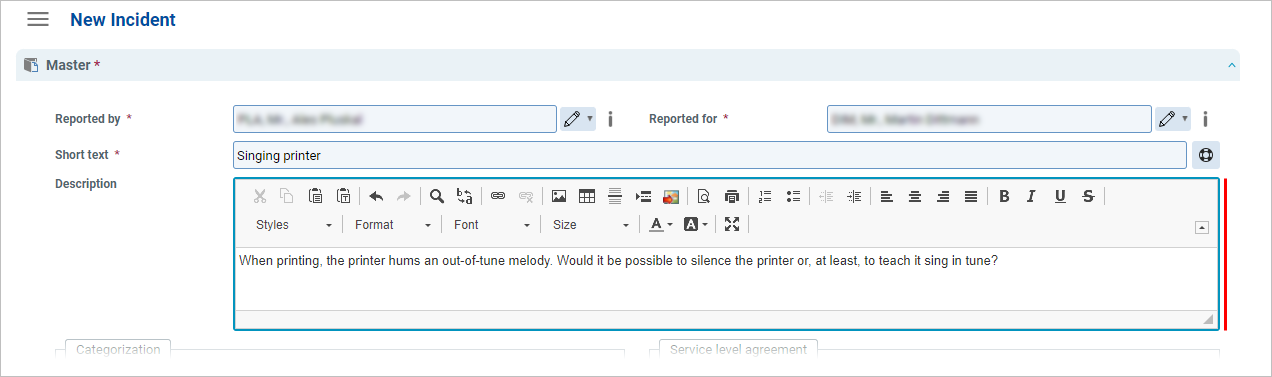
Compared to a common description field which can be found in many Views in USU Service Management, the Rich Text Editor enhances the plain text description by enabling users to use formatting and insert graphics. The Rich Text Editor plays the part of the internal HTML editor.
By default, the Rich Text Editor may be collapsed in the editor. Click the Expand button  in the right-hand top corner to expand it.
Note that any text formatting becomes plain text when viewed in the Rich Client. The full scope of formatting is available in the Web Client only.
Note: Please note that the Rich Text Editor is just a simple web component and does not offer a full-featured word processor experience as such. It means that it enables you to do just the basic formatting and image operations. A direct copy-paste actions from an external text editor such as MS Word may result in the partial loss of the source formatting.
The Formatting toolbar has the following options:
Element | Function / Meaning | |
Styles | Enables you to select the required style of the font. | |
Format | Enables you to select the required format of the text. | |
Font | Enables you to select the required font of the text. | |
Size | Specifies the font size. | |
Here you can select the style of characters. Bold, italics, underline and strike-through styles are available. | ||
Enables you to set text color. A basic chart of colors is available (after you click the drop-down button). By clicking "more colors" on the drop-down menu, you can define a more specific color if required. | ||
Enables you to set the background color of the text. The background color works like a highlighter in this case. A basic chart of colors is available (after you click the drop-down button). By clicking "more colors" on the drop-down menu, you can define a more specific color if required. | ||
Using the align buttons, you can align/center the paragraph as required. By default, the editor is preset to align text flush left with the left margin, leaving a ragged right edge. | ||
Link and Unlink buttons. It is possible to create hyperlinks in the text editor on both the pictures and text segments. | ||
These buttons enable you to insert/remove number and bullet lists. The buttons act like on/off switches. | ||
Increase and Decrease indent. It is possible to adjust the spacing of the first line of a paragraph to create a hanging or negative indent or indent the whole paragraph. You can use this function in a similar way if you are working with a bulleted or numbered list. | ||
Undo and Redo buttons. If you make a mistake when using the Editor, you can “undo” the action or command. If you decide to go through with the action after all, you can also “redo” it. Obviously, there are certain actions you can’t undo, such as saving or printing. | ||
Find and Replace functions. These actions enable you to work actively with longer text in the text field. | ||
Standard cut/copy/paste operation buttons. The paste button with the notepad symbol pastes the clipboard content as plain text only. Please read the 'Pasting in the rich text editor' paragraph below for paste operation specifics. | ||
Enables you to expand or collapse the whole formatting toolbar. | ||
Operations for pasting of images. 'Paste as pictures' pastes specifically image content from the clipboard (see 'Pasting in the rich text editor' below for more information). 'Upload picture from local disk' opens a browse dialog for inserting images stored as local files. The 'Image' button opens a property editor of the currently selected image (image size, border, vertical and horizontal space, alignment etc.). Note: You can limit the size of the uploaded image by the 'Maximum allowed size of attachments' parameter in Global Settings. | ||
Maximizes the Rich Text Editor window so that it occupies the whole browser. Click again to get it back. | ||
Insert USU Service Management workflow link. Clicking the icon opens a dialog which makes it possible to insert in the text a link starting a USU Service Management workflow. See topic 'Formatter: Rich Text' for more information. | ||
Inserts a horizontal line / page break. This is usually used for printing to make the printed text well arranged. | ||
Print and Preview buttons. Use the Print button for direct printing or use the Preview button to have the print page displayed before the actual print. | ||
There are some additional settings for the Rich Text Editor in Settings > Client Settings.
For Rich Text control customization, see the View Customizer chapter of Core Functionality documentation.