Start Page operations
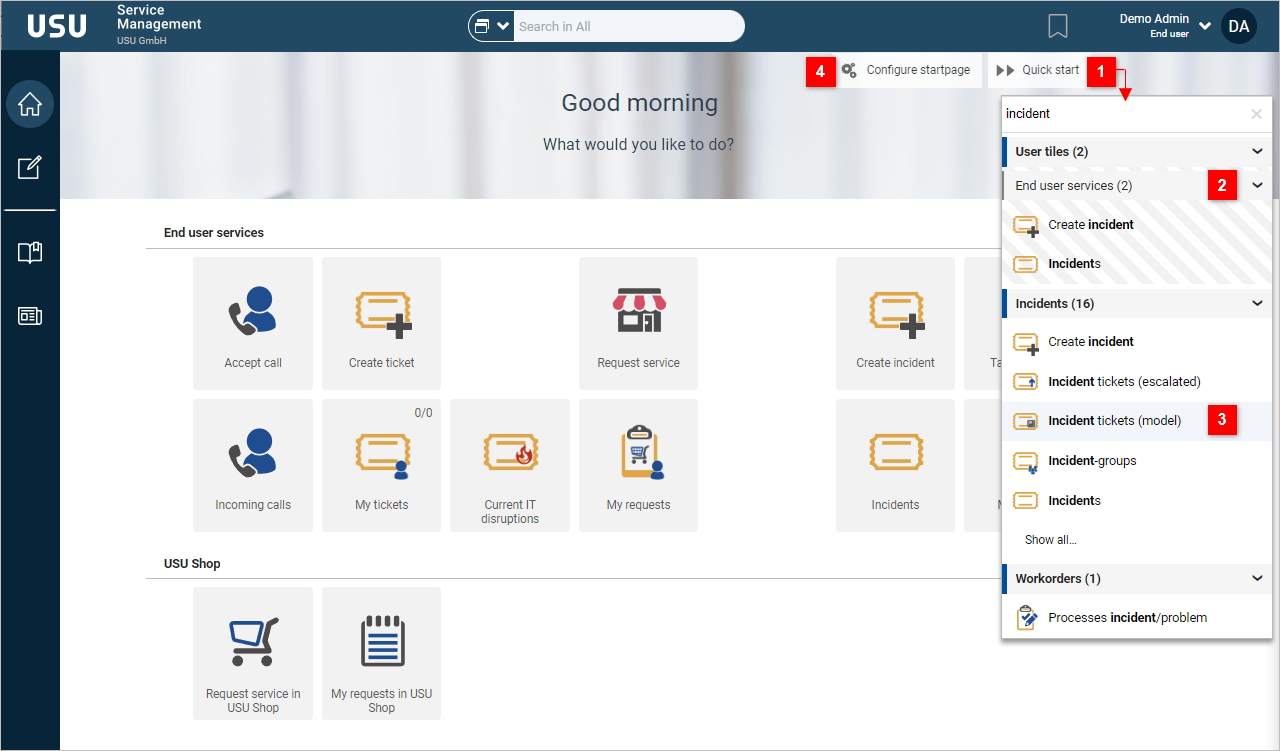
Launch the tile actions quickly
Click Quick Start (1).
A list of all existing tiles organized by Business Categories opens (2).
Locate the desired tile
OR
use the Search field to search for a tile quickly according to tile labels.
Click the tile (3).
Depending on the Smart Tile type, the tile performs the associated action.
Note: The Quick Start action appearance on the Start Page can be prohibited in the Authorization Manager. Set the 'No Execute' permission to the .tile.page.quickstart action to disable the button.
It is not possible to edit the tiles or move them onto the Start Page from the list.
If you want to do this, you must click the Configure Startpage (4) first.
Note: The Configure Start Page action appearance on the Start Page can be prohibited in the Authorization Manager. Set the 'No Execute' permission to the .tile.page.modification action to disable the button.
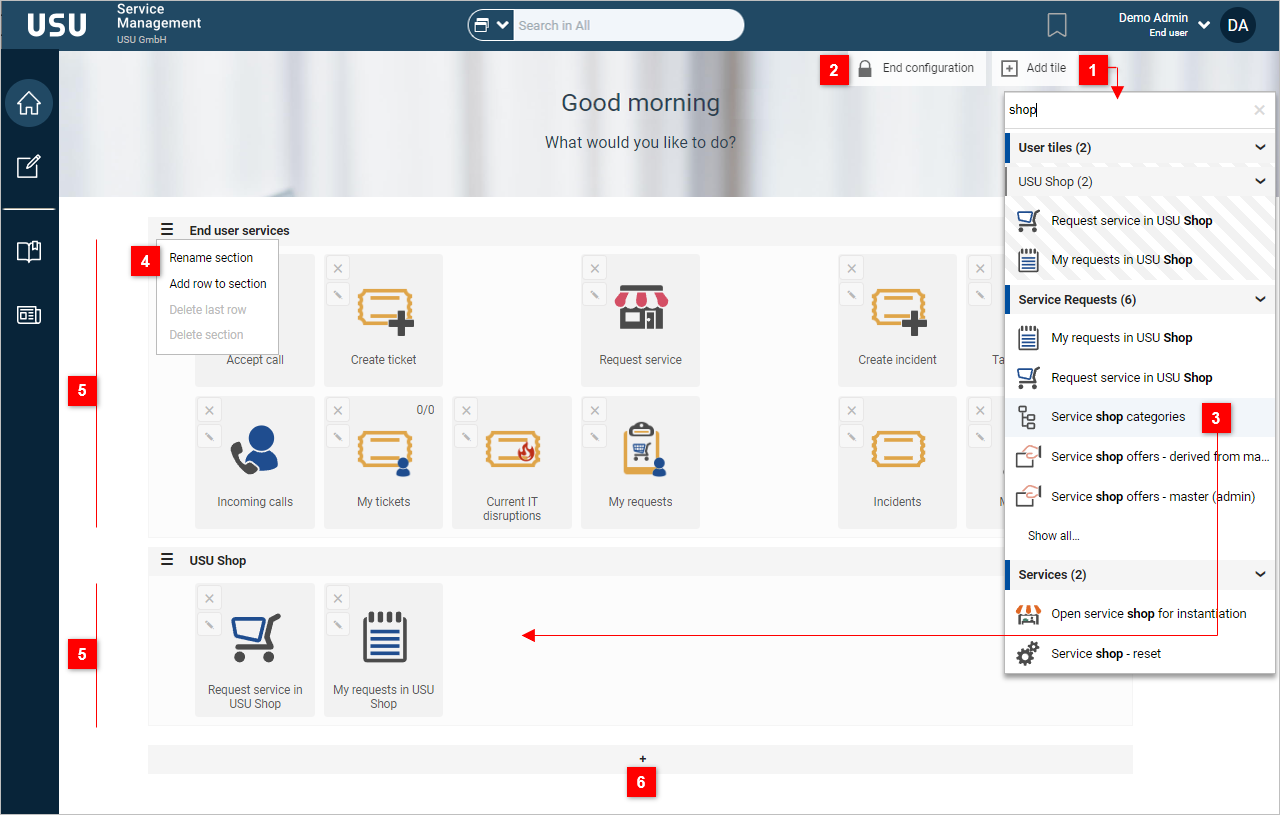
Add new tiles to the Start Page
Click Configure Start Page (see the 1st picture).
The Start Page switches into the configuration mode.
Click Add Tile (1).
A list of all existing tiles organized by Business Categories opens.
The Search field at the top of the list can be used to search for tiles according to tile labels.
Hover over a tile item in the list.
The tile item gets highlighted (3).
Click in the highlighted line in the list to drag & drop the tile to the selected section (5) of the Start Page.
The position where the tile goes gets shadowed.
Proceed in the same way to add more tiles to the list.
Note: By default, maximum of 14 tiles can fit in one section. If you want to fit more, add another row via the Add row to the section action in the control menu (4). To accomplish even more complex customization, use the following main parameters:
startPage_gridColsCount - allows you to change the number of columns
startPage_gridRowsCountLimit - allows you to set the maximum rows of a section
Adding another tile onto the right-hand bottom corner of the existing tile creates a tile folder with both the tiles. You can add more tiles into the folder or keep creating folders this way.
Click End Configuration (2) to close the configuration mode.
Add a new section to the Start Page
Click Configure Start Page (see the 1st picture).
The Start Page switches into the configuration mode.
Click the plus icon (6) to add a new section (5) to the Start Page.
Each section contains its control menu (4) where you can:
Rename the section
Add another row to the section
Delete the last row of the section
Delete the whole section
Note: If there is only one section present, the section header (name) is not visible outside of the configuration mode.
Expand or collapse the section by clicking the section header or by using the arrow icons

in the right-hand top corner of each section (not visible in the picture).
Click End Configuration (2) to close the configuration mode.
Sort and move tiles
Use Drag & drop to move and sort tiles within the sections.
Use Drag & drop to move tiles between the sections.
Disabling the Configure Startpage option
It is possible to disable the Configure Startpage option for certain users.
To disable the Start Page configuration, No Execute right has to be explicitly set to the .tile.page.modification action.
Note: Default action rights are not taken into account in this case because the majority of users/roles are expected to be allowed to modify their Start Page. It is because in most cases, the majority of users/roles have default right set to No Read/No Execute, which means that the Read/Execute rule would have to be set for most of them individually.